
Introduction
Making sure users only see the information pertinent to their responsibilities has grown essential as businesses depend more and more on data-driven decision-making. While an HR manager should only have access to employee data within their department, a sales manager should view sales data for their territory. This is where Power BI’s Row-Level Security (RLS) becomes crucial.
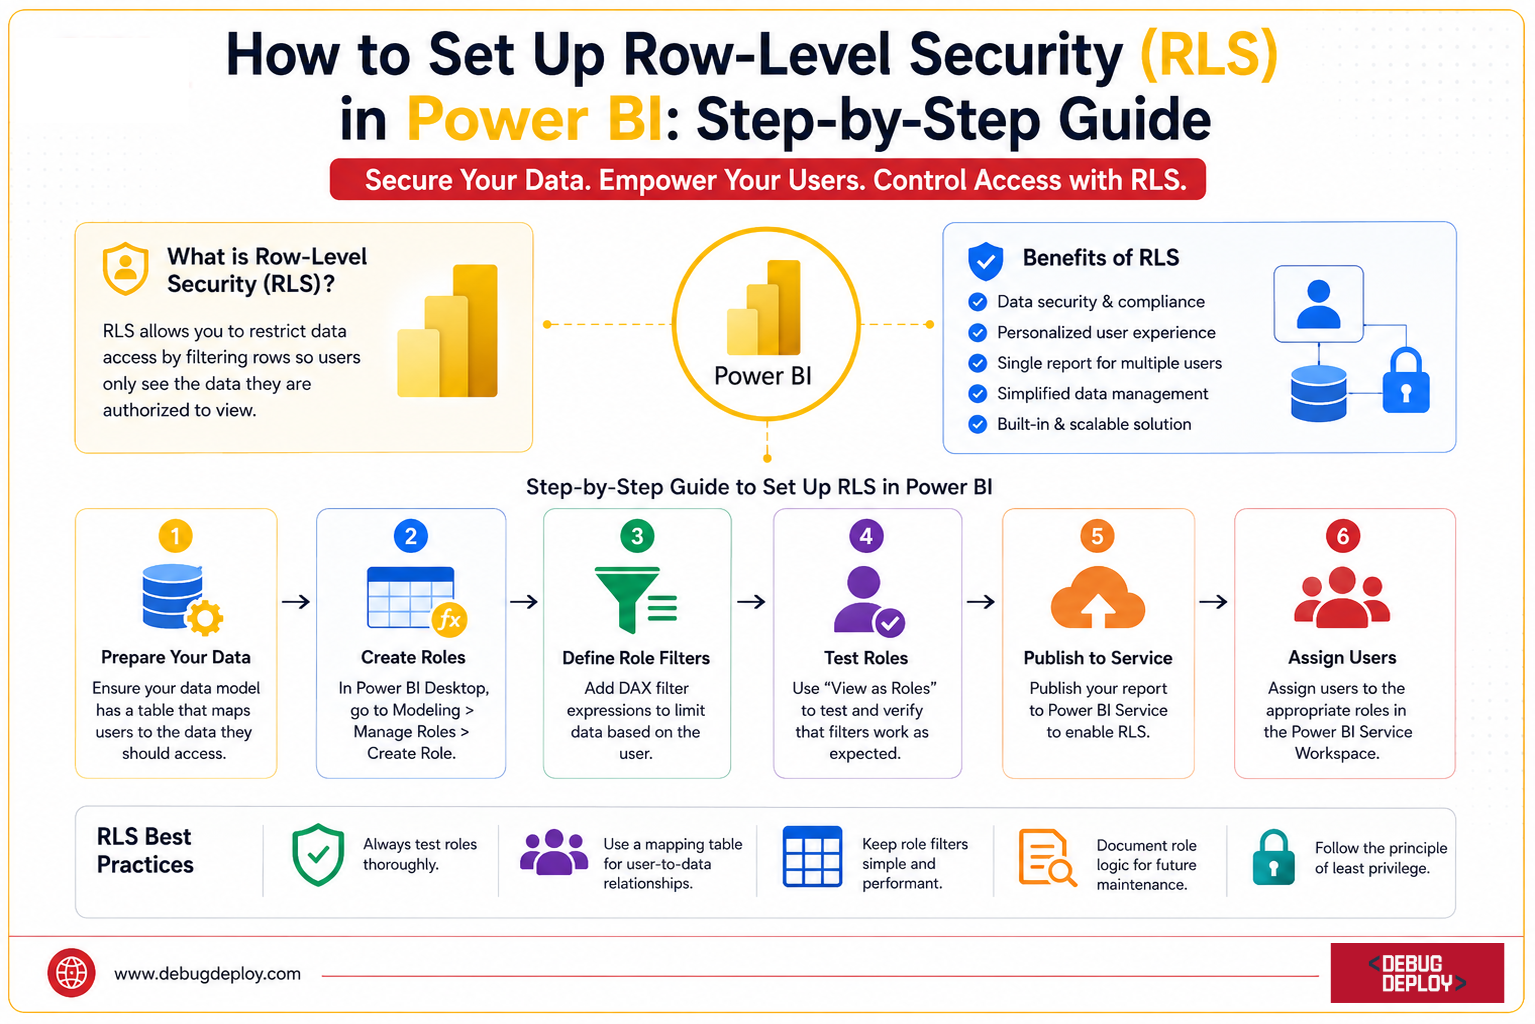
By filtering rows in a dataset according to pre-established rules, Row-Level Security enables you to limit data access for particular people. Power BI allows you to manage data access within a single report while upholding security and compliance, as opposed to generating several reports for various teams.
In this step-by-step guide, you’ll learn what Row-Level Security is, why it matters, and how to configure both static and dynamic RLS in Power BI.
What Is Row-Level Security (RLS)?
Row-Level Security is a Power BI feature that controls data visibility at the row level. It ensures users only see records they are authorized to access.
For example:
A North Region manager sees only North Region sales.
A South Region manager sees only South Region sales.
Executives can view all regions.
This approach enhances security while simplifying report management.
Why Use Row-Level Security in Power BI?
Organizations implement RLS for several important reasons:
Data Security
Sensitive information remains accessible only to authorized personnel.
Regulatory Compliance
Helps meet requirements related to GDPR, HIPAA, and other data privacy regulations.
Better User Experience
Users see only relevant data, reducing confusion and improving report usability.
Centralized Reporting
Instead of maintaining multiple reports for different departments, a single report can serve all users securely.
Reduced Maintenance
One report with RLS is easier to manage than several separate reports.
Types of Row-Level Security in Power BI
Power BI supports two primary RLS approaches:
Static RLS
Static RLS uses predefined filters for specific roles.
Example:
Sales_North role → Region = “North”
Sales_South role → Region = “South”
Best suited for smaller organizations with fixed access requirements.
Dynamic RLS
Dynamic RLS automatically determines data access based on the logged-in user.
Example:
User A automatically sees North Region data.
User B automatically sees South Region data.
Best suited for larger organizations with many users.
Prerequisites Before Setting Up RLS
Before configuring Row-Level Security, ensure you have:
Power BI Desktop installed
A properly modeled dataset
Power BI Service access
User email mappings (for dynamic RLS)
Appropriate workspace permissions
For this guide, let’s assume we have a sales table containing:
Employee | Region | Sales |
John | North | 50,000 |
Sarah | South | 45,000 |
Mike | East | 60,000 |
Emma | West | 55,000 |
Step 1: Open Your Power BI Report
Launch Power BI Desktop and open the report containing the dataset you want to secure.
Verify that:
Tables are properly related.
Data loads correctly.
Reports function as expected.
It is always easier to configure security after data modeling is complete.
Step 2: Create Security Roles
Navigate to:
Modeling → Manage Roles
A dialog box will appear allowing you to create security roles.
Click:
Create
Enter a role name such as:
NorthRegionManager
SouthRegionManager
HRTeam
Executives
Choose meaningful role names to simplify future administration.
Step 3: Define Row-Level Filters
After creating a role, select the table containing the security field.
For example, select the Sales table and enter:
[Region] = “North”
This filter ensures users assigned to the role only see North Region records.
Similarly:
[Region] = “South”
would create access for South Region users.
You can create multiple roles using different filter conditions.
Step 4: Save the Role
Once filters are configured:
Click Save
Close the Manage Roles window
The role definitions are now stored within the Power BI model.
Step 5: Test the Security Rules
Power BI allows you to simulate user access before publishing.
Go to:
Modeling → View As
Select the role you created.
For example:
NorthRegionManager
Click OK.
The report will refresh and display only the rows available to that role.
This testing step is extremely important because it verifies your security configuration before deployment.
Step 6: Configure Dynamic Row-Level Security (Optional)
Static RLS works well for smaller environments, but large organizations often require dynamic security.
Create a User Mapping table such as:
Region | |
john@company.com | North |
sarah@company.com | South |
mike@company.com | East |
Load this table into Power BI.
Create a relationship between:
User Mapping[Region]
Sales[Region]
Now create a role with the following DAX expression:
[Email] = USERPRINCIPALNAME()
The USERPRINCIPALNAME() function retrieves the currently logged-in user’s email address.
Power BI automatically filters data based on the matching email.
This approach eliminates the need to create hundreds of individual roles.
Step 7: Publish the Report
After validating RLS:
Click Publish
Select your Power BI workspace
Upload the report
Once published, security settings become available in Power BI Service.
Step 8: Assign Users to Roles
Open Power BI Service.
Navigate to:
Workspace → Dataset → Security
You will see all roles created in Power BI Desktop.
Select a role.
Add:
Individual users
Security groups
Microsoft Entra ID groups
Click Save.
Users are now assigned to the selected security role.
Step 9: Test Security in Power BI Service
Power BI Service provides a testing feature.
Open:
Dataset → Security
Select:
Test as Role
Choose the role you want to verify.
Power BI will display the report exactly as users assigned to that role would see it.
This final validation ensures security behaves correctly after deployment.
Common RLS Functions in Power BI
Several DAX functions are commonly used when building RLS solutions.
USERPRINCIPALNAME()
Returns the current user’s email address.
USERPRINCIPALNAME()
USERNAME()
Returns the current username.
USERNAME()
LOOKUPVALUE()
Retrieves values from related security tables.
LOOKUPVALUE()
RELATED()
Returns related values from connected tables.
RELATED()
These functions are frequently used in dynamic security models.
Best Practices for Row-Level Security
To ensure effective implementation, follow these best practices:
Use Dynamic RLS Whenever Possible
Dynamic security scales much better than maintaining multiple static roles.
Keep Security Tables Separate
Store user mappings in dedicated security tables for easier management.
Test Thoroughly
Always validate roles before publishing.
Use Security Groups
Assign Microsoft Entra ID groups rather than individual users when possible.
Document Security Rules
Maintain documentation explaining role definitions and access policies.
Follow Least Privilege Principles
Users should only access data required for their responsibilities.
Common RLS Mistakes to Avoid
Many Power BI developers encounter issues due to common configuration mistakes.
Avoid:
Missing relationships between tables
Incorrect DAX filters
Assigning users to the wrong roles
Overlapping security roles
Hardcoding user access unnecessarily
Failing to test roles before deployment
Careful planning helps prevent security gaps.
Real-World Use Cases
Row-Level Security is widely used across industries.
Sales Teams
Regional managers view only their territory’s performance.
Human Resources
HR staff access only authorized employee records.
Finance
Department managers view their budgets and expenses.
Healthcare
Medical staff access only approved patient information.
Retail
Store managers see data for their specific locations.
These scenarios help organizations maintain security while supporting data-driven decision-making.
Conclusion
One of Power BI’s most useful security capabilities is Row-Level Security, which enables businesses to manage data visibility without generating numerous reports. Businesses may guarantee that each user sees only the information that is pertinent to them by creating roles, using filters, and assigning individuals correctly.
Static RLS offers a straightforward solution for smaller situations. Dynamic RLS provides scalability, automation, and simpler management for larger businesses. Row-Level Security helps businesses safeguard sensitive data while providing individualized reporting experiences when used in conjunction with appropriate testing and governance.
For Power BI developers, administrators, and data professionals who wish to create safe, enterprise-ready analytics solutions in 2026, learning Row-Level Security is still crucial.
Want to Master Power BI Security & Data Governance?
Get trained by a Microsoft Certified Trainer (MCT) and learn how to secure business data with Power BI, including Row-Level Security (RLS), workspace management, and enterprise reporting best practices.
Recommended Microsoft Power BI Certification Programs:
PL-300: Microsoft Power BI Data Analyst
PL-900: Microsoft Power Platform Fundamentals
DP-900: Microsoft Azure Data Fundamentals
DP-600: Implementing Analytics Solutions Using Microsoft Fabric
✅ Live Instructor-Led Training
✅ Row-Level Security (RLS) Implementation
✅ Power BI Data Modeling & DAX Skills
✅ Secure Report Sharing & Workspace Management
✅ Enterprise Data Governance Best Practices
✅ Certification Exam Preparation & Guidance
📧 Email: trainings@debugdeploy.com
📱 WhatsApp: Contact us for quick assistance
Learn how to build secure, enterprise-ready Power BI solutions with hands-on training in data security, access control, and interactive business intelligence reporting.